
Inspired by designer Amy Studebaker’s viral powder room this guide walks you through exactly how to frame Schumacher’s Hydrangea Drape wallpaper — from planning your panels to installing the trim for a polished, editorial finish.
The framed Schumacher Hydrangea Drape wallpaper look she created is the kind of detail that makes an overdone wallpaper look fresh and unique. It does require lot of planning, patience, the right tools, and a very specific understanding of how to hang a wallpaper that is asymmetrical and make it look symmetrical.
Here’s the full breakdown of how to recreate it in your own entryway.
“Framing wallpaper is not a new concept — but this execution is very special”
Tools & Supplies you’ll need
Before touching a single wall, gather everything on this list.
Laser level – You need a good laser level that you know how to use. You are going to be become best friends with it.
Chalk line marker – I can’t tell you how much I despise this tool for the amount of mess it made, but I don’t think there is a substitute for this one. You need something that can mark long, straight lines.
Blue or Green Tape – No preference, just whatever you have on hand.
Color matched trim – We matched it to the stem color, but you can do a middle of the leaf or even some other elements in the paper. We used Ben Moore Advance in satin sheen for this.
Wall paint – We got the wall paint matched the ground color of the wallpaper. Here is how that process works.
Wall paper hanging supplies – like adhesive, smoothing tool, seam roller and any other tools for hanging the wallpaper.
Wallpaper – Schumacher Hydrangea Drape. I used the green color way but it’s a classic in any one of them.

Step 1 Plan Plan Plan
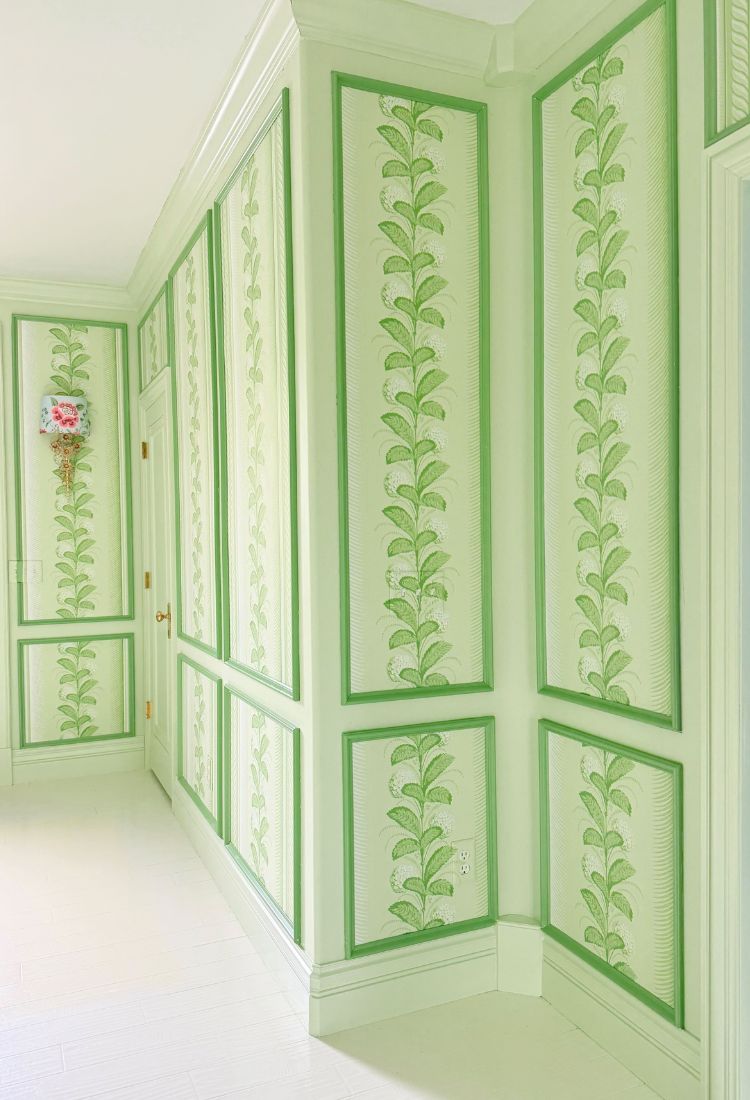
This is the most important planning step and one most people rush through. Decide how many panels you want per wall, then map out the spacing between each panel.
You’ll also need to determine the distance from the floor, the baseboards, and the crown molding.
Sketch it out on paper first if that helps. Ask your bff chat.
Think about your sconces and anything fixed on the walls that is decorative or that matters. We didn’t, and now I have two sconces are 1″ off center. I notice that misalignment every time I walk by.

Step 2 – Mark the walls
Mark the walls for yours starting points.
You have to decide on distance between panels, distance from the baseboards and from the crown. You have to come up with the number of panels each wall will take and mark the walls for it.
Then use your laser guide and chalk line maker to mark straight lines on the wall. Check and double check for straightness and consistency.
We chose to do two panels (top and bottom) just like Amy so you also need to mark those at this time.

Step 3 – Tape the Lines to Paint The Walls
If you have already painted the walls then you can skip the taping part. In our case, I had white walls so I need to tape paint them. I didn’t want to hang paper on top of fresh paint so I decided to paint around the future frames.
To do that, Eric went ahead and taped all the lines so they are visible when it’s time to attach the trim to the wall. You need to preserve the lines until the very last step of attaching trim to the wall.

Step 4 – Understand The Pattern
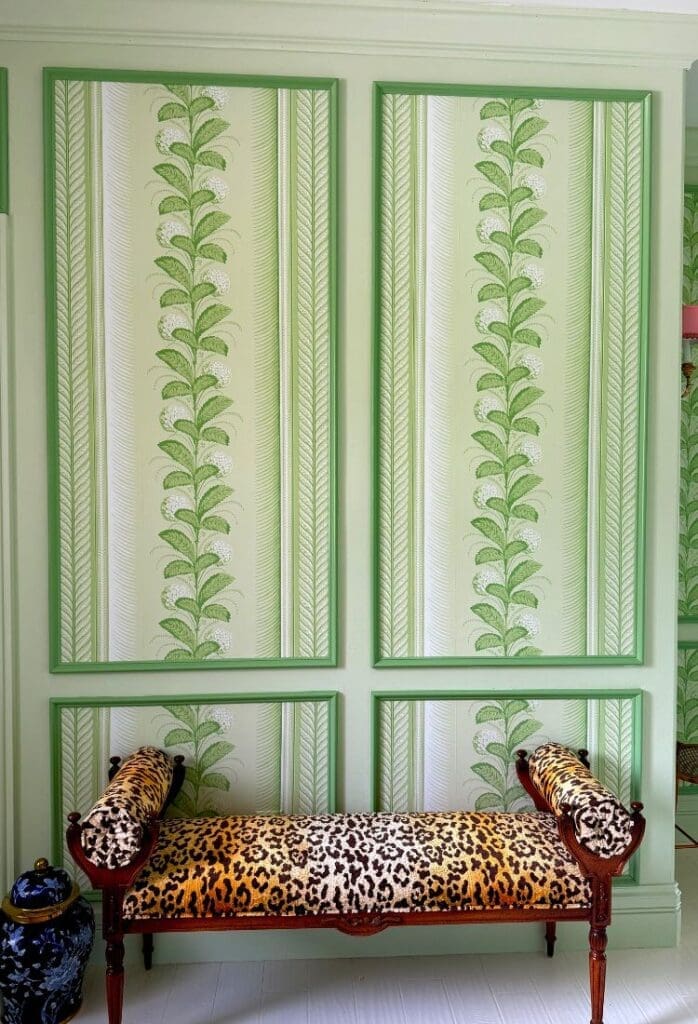
What makes the Schumacher Hydrangea Drape pattern unique and tricky? It’s asymmetrical. The hydrangeas — the focal point of the entire design — sit off to the left side of the repeat. This means you can’t simply hang the paper inside your frame and call it done.
You need to center the hydrangea stem on the frame, which requires deliberate positioning before a single strip goes up. Mark the center of every panel clearly before you start hanging.

Step 5 – Hang the Paper
Our goal is to align with the center perfectly from the very top to the very bottom of each panel.
For this, you will need to –
Keep your laser level on at all time.
Have enough paste on the paper or the walls to move things around.
Have a lot of patience as the paper never wants to hang straight and needs to be repositioned many times.
Once you hang the right panel nice and straight, 80% of the hard work is over. Everything else gets easier.

Step 6 – Hang the Left Panel
Based on the width of the frame, you may need to cut a fresh piece of the paper or you might be able to use the cut off part from the right piece.
The paper is 27″ wide so any panel under 27″ will have zero waste, which is great news because wallpaper is so expensive and I hate wasting it.
Once the left panel is attached you will see the picture and breath a sigh of relief.
Step 7 – Add the Trim Molding
Now comes the actual frame that needs to be added to finish the job. Remember that you needed to preserve the chalk lines so you can use those to attach trim.

Caulk, Touchup & Cleanup
You can get your caulk matched to the trim color from your paint store. Makes life so much easier when you don’t have to paint the caulk.
Next step is minor touchups where the paint on the trim chipped. It’s inevitable. It’s no big deal.
The chalk mess on the walls and the floors will need thorough cleanup.
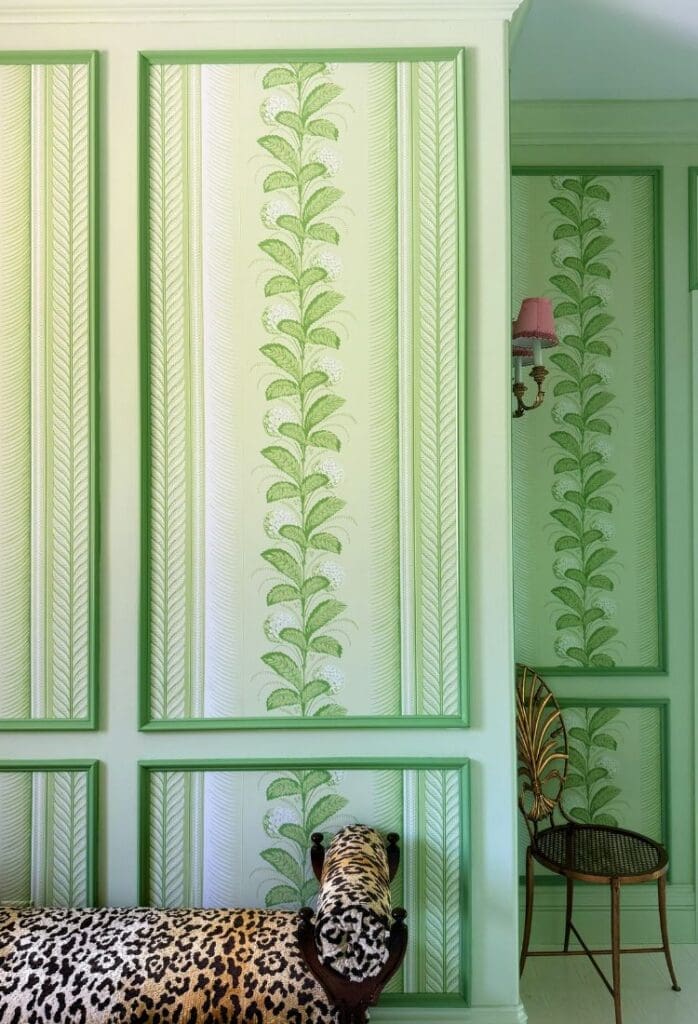
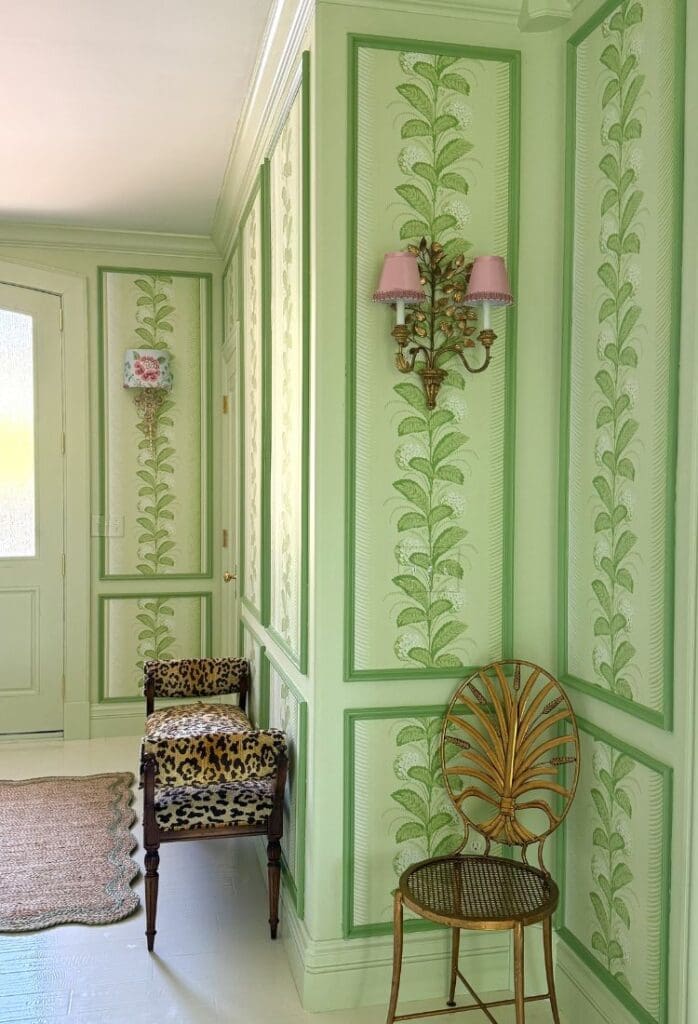
The finished look
The result is a quietly sophisticated entryway treatment that feels considered and intentional — not just wallpaper, but a moment. The asymmetry of the Hydrangea Drape pattern is what makes the centering work so beautifully; the drama of that botanical focal point, perfectly placed within each frame, does all the talking.