
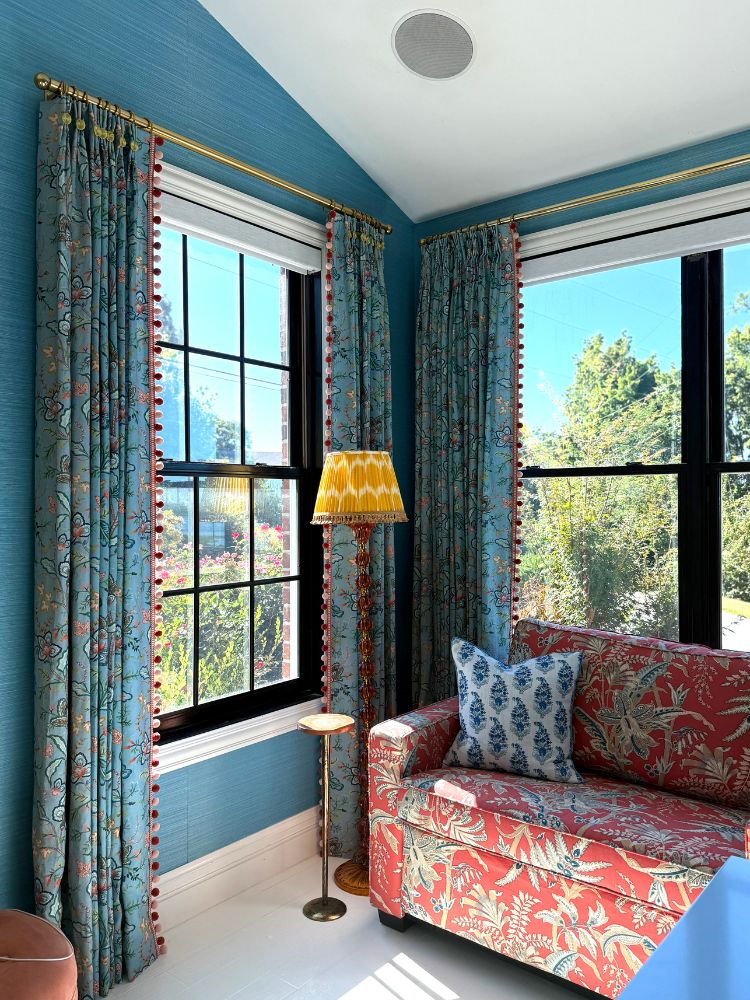
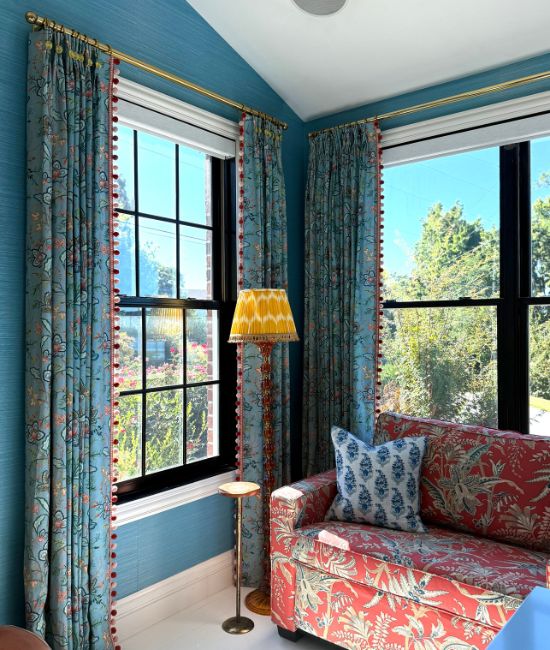
When I was planning out our window treatments for the home office, I had a very specific look in mind: a long, continuous curtain rod with no middle support brackets—just a sleek, uninterrupted and upscale.
We remodeled the powder room attached to this room and you can read about that here.
I quickly discovered that to get that look, I would’ve had to spend around $350 for an 8-foot brass rod. That price didn’t even include hardware or finials!
Instead, we decided to take a DIY the curtain rods and ended up creating a luxe look for a fraction of the cost.
DIY Curtain Rods Using Closet Rods from Amazon
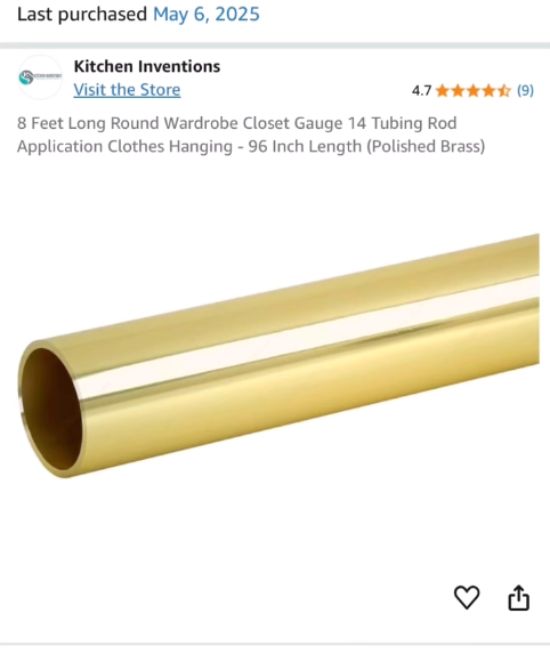
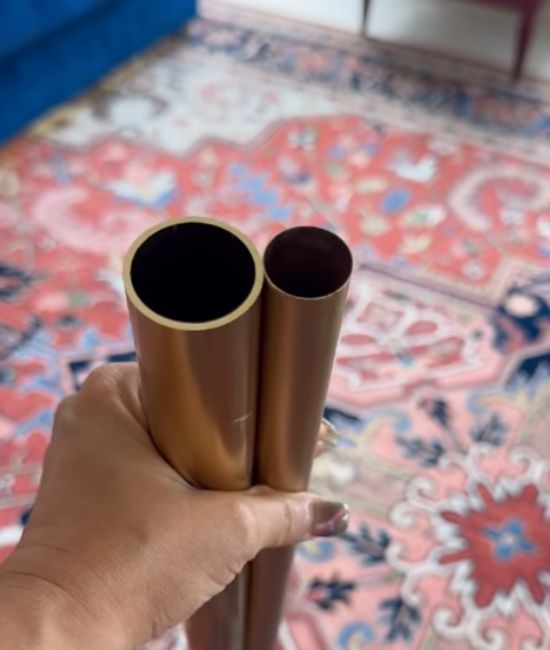
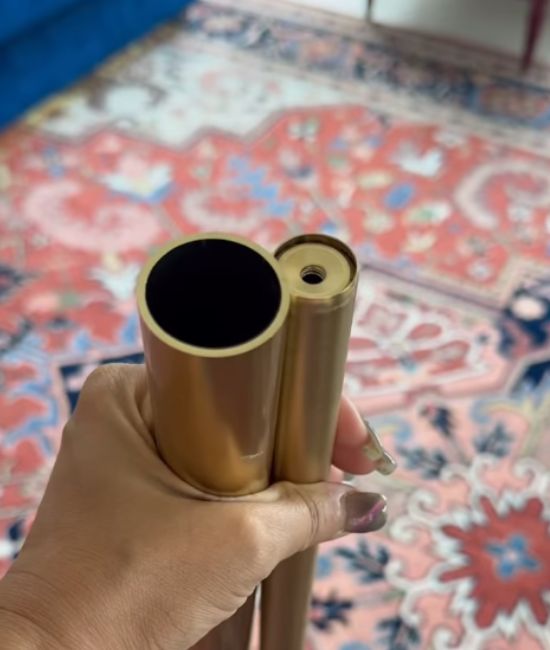
We found a great alternative: a thick aluminum closet rod on Amazon for about $100 (including shipping). These rods are surprisingly substantial, almost 1.25″ in diameter.
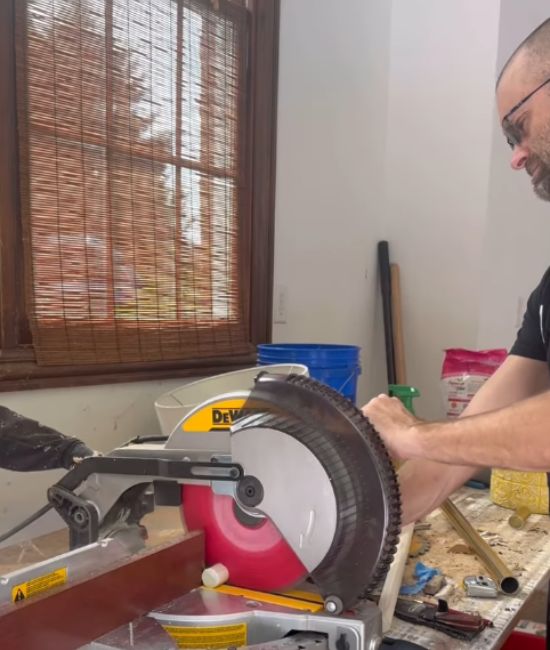
I actually prefer the chunkier profile over standard curtain rods. Since they’re made of aluminum, they’re also easy to cut using a miter saw fitted with a metal-cutting blade.
The Challenge: No Threaded Inserts For A Finial
Because these rods are designed for just closets, they don’t have the threaded inserts that you’d typically use to attach finials (the decorative end pieces on curtain rods).
\But we came up with a simple fix.
Our DIY Solution
To create our own inserts, here’s what we did —
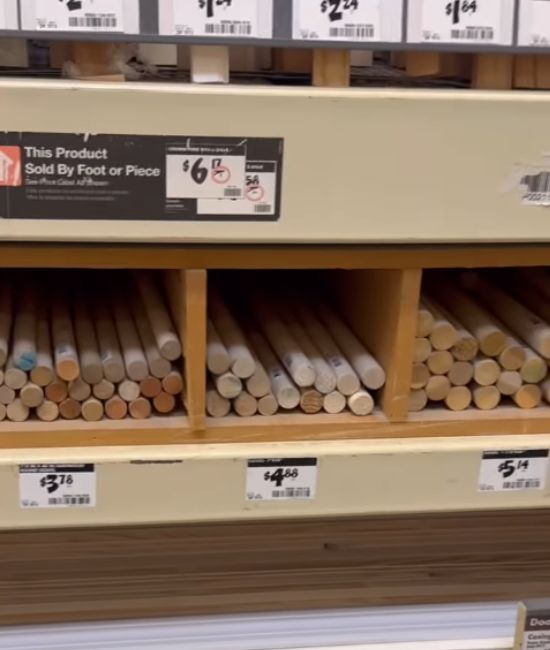
We used dowels from The Home Depot that fit snugly inside the curtain rod.
Measured and cut a wooden dowel to about 2 inches in length.
Inserted a threaded bolt into the center of the dowel—this would allow us to screw in the finials.
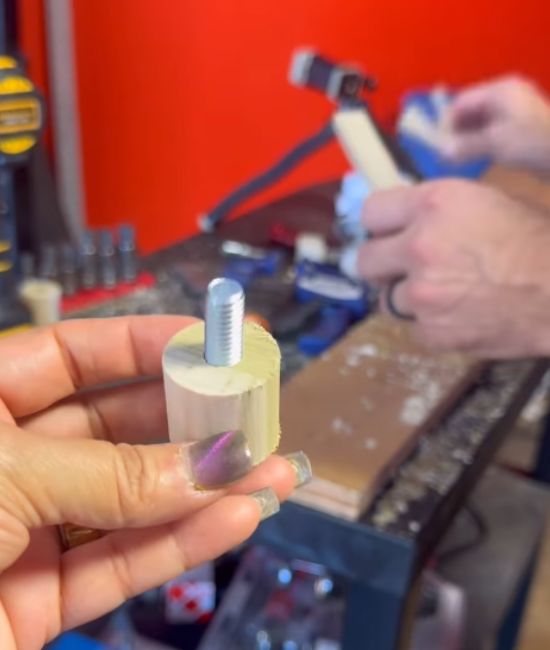
Mixed up a bit of JB Weld epoxy (any strong epoxy will do), and used it to secure the dowel inside the end of the rod.
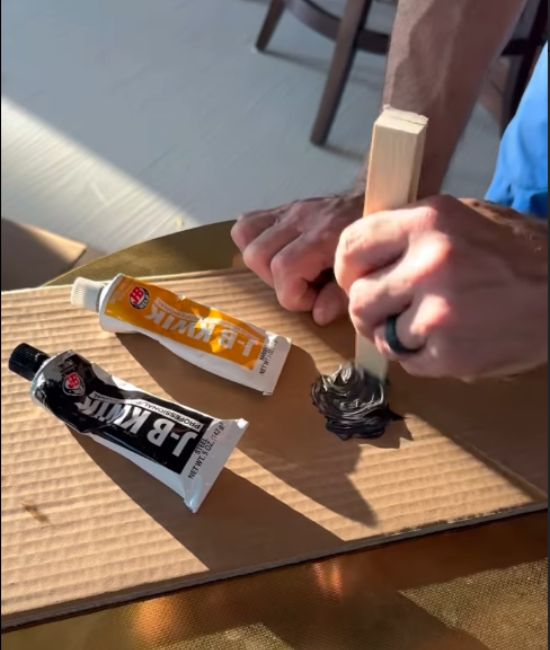
Let it cure for a few hours to ensure everything was locked in place.

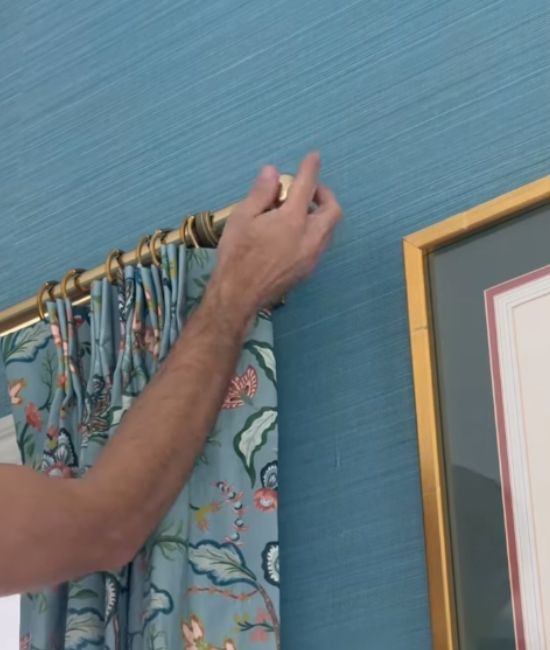
Once dry, we attached the finials—and done!
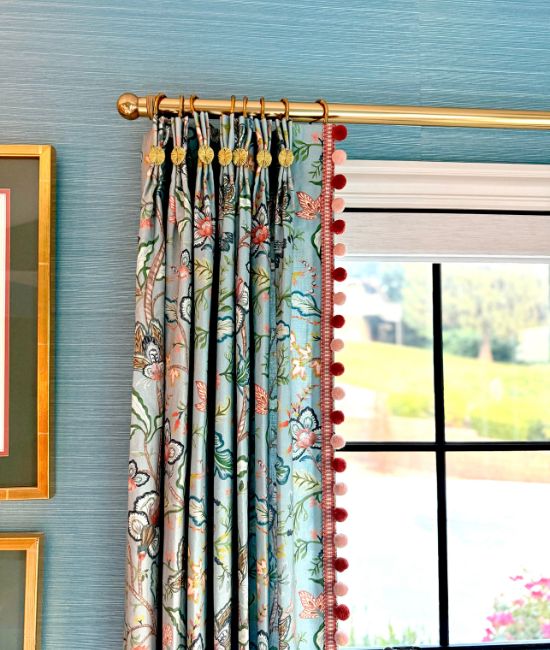
The Final Result
The finished look is exactly what I envisioned: sleek, chunky brass rods spanning the windows with no ugly center support, giving the space a clean, high-end feel. And the best part? We saved several hundred dollars by choosing to DIY.
Tips if You Want to Try This at Home:
- Be sure to measure your window span accurately so you know what length rod to order.
- Use painter’s tape when cutting the rod to reduce burrs.
- Let your epoxy cure fully before adding finials or hanging your curtains.
- If you’re hanging extra-heavy drapes, test the strength before skipping the center bracket.
If you love a high-end look but don’t love the price tag, this is a great project to try. It’s surprisingly simple—and the impact it makes is so worth it
Resources For DIY Curtain Rods
8 Feet Long Round Wardrobe Closet Rod – https://amzn.to/3UMUQcv
JB Weld Epoxy – https://amzn.to/3UOUSRd
1 x 12″ Wooden Dowel Rods – https://amzn.to/3VlyleU